Showing posts with label SOG. Show all posts

Friday, March 8, 2013

Formless method to repairing a broken corner

I'm making this post from my phone, so I REALLY hope it turns out ok!  Please forgive any really odd formatting or typos if there are any. My phone makes some strange auto corrects sometimes that I don't always catch!

Have I ever mentioned that I generally  dislike sculpting on forms?  I can do it, but I'm not a pro and not professionally trained in it, so it takes me quite a bit of time and patience. I'm not known fur my patience and I'm regularly short on time. This is why if I break a nail I prefer to just tip it rather than sculpt a tip. So....... I much prefer this method of repairing a corner that's snapped off, though I can also do this with a form. 

This method utilizes self adhesive silk wraps, soak off gel (SOG) and hard gel. The silk wraps are just ones I picked up at Sally Beauty Supply. The hard gel I have us one I've had forever - IBD builder gel. I so rarely use it as I don't break many nails anymore, but if I ever need to replace it ill probably get the Gelish or Entity One hard gel. Use whatever you have/like. This IBD I got at Sally's, so it's locally available. Personally I prefer the pink, I think it looks more natural, but there's nothing wrong with using clear either. 

You could also use this method to add a small amount if length, but not a lot. The repairs are sturdy but remember its just a silk wrap so if you tried to add too much it wouldn't stay stiff enough to be a base for the hard gel. You are basically using it as a non-removable form. 

I have never really had any trouble soaking this gel off using this method, though I do file the majority if it down before I soak off. 

Sorry, no video for this one. It was sort if an impromptu tutorial.  I don't have the opportunity to show you guys many repairs, so figured I'd take this one.  I'm also right handed and this repair is ON my right hand, so forgive the crummy photography!  

The process:
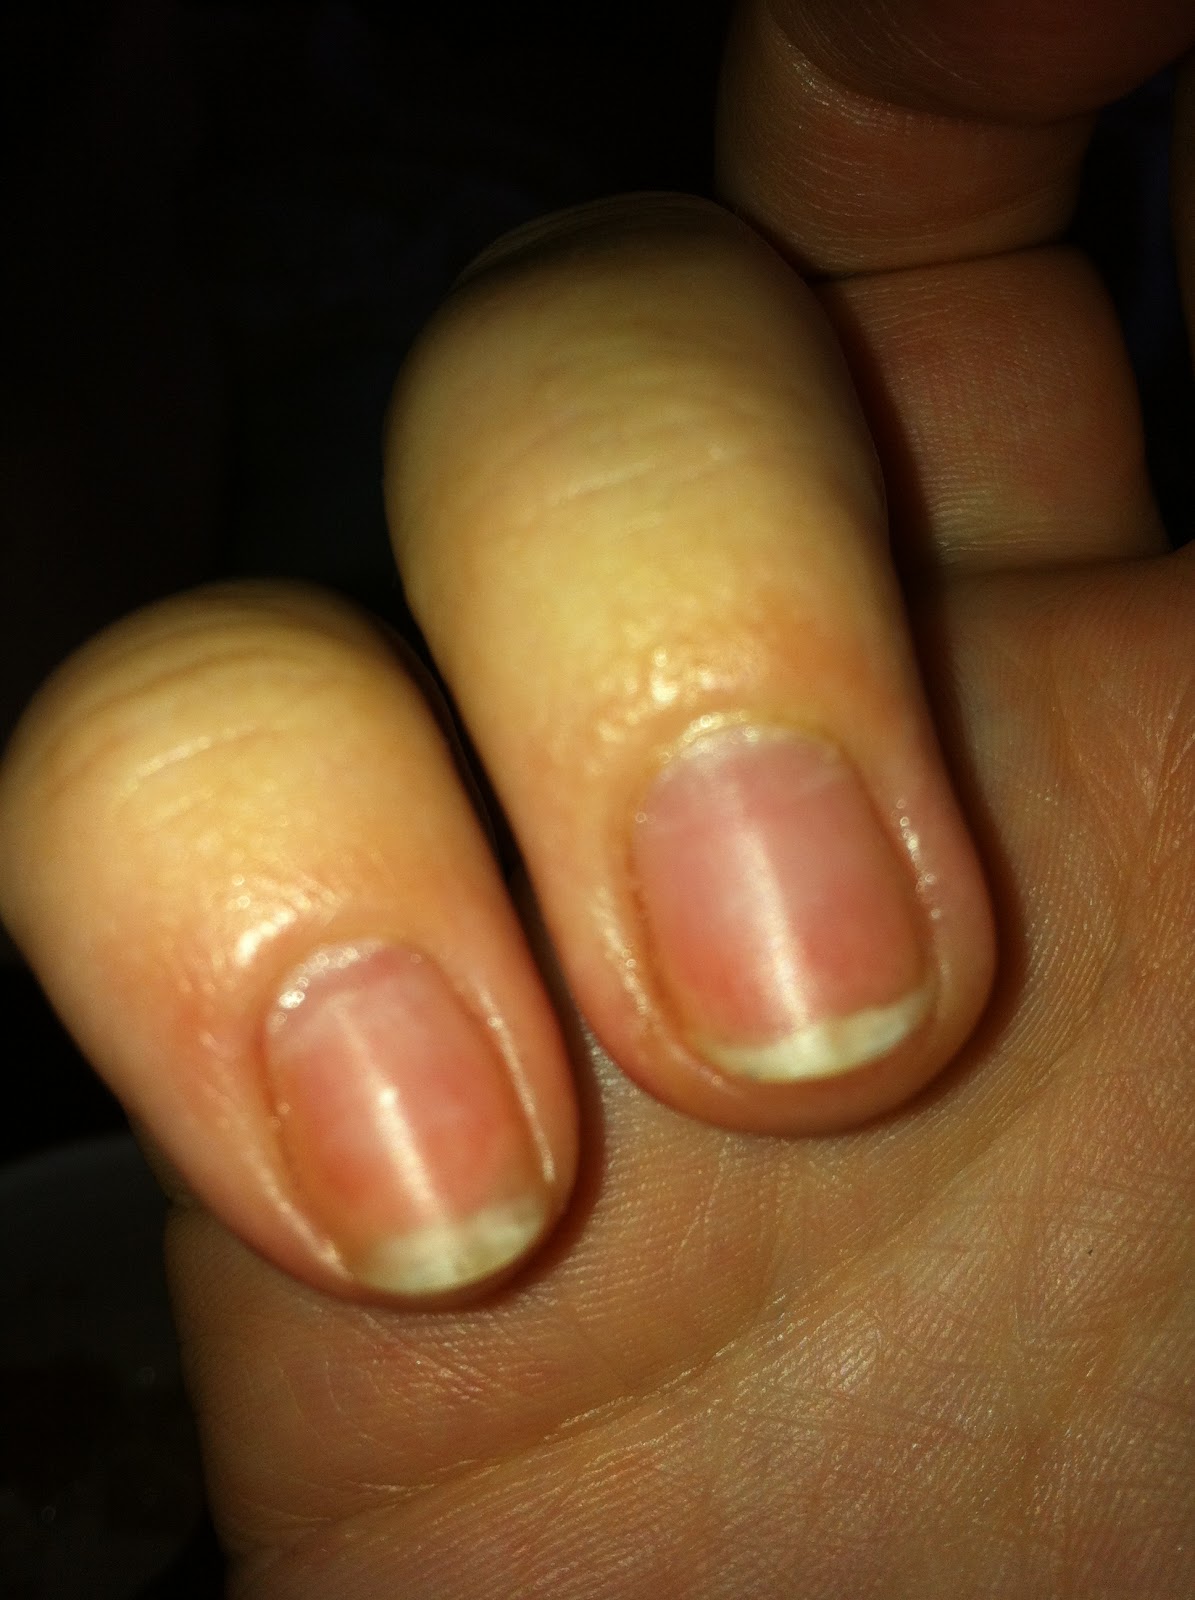
Start by removing any gel/polish from the broken nail.  Prep as you normally would before doing a mani. This mani was only two days old so I didn't need any cuticle work or anything. Here you can see my naked nail and its poor broken corner. 

Next thing to do is cut yourself a piece of silk wrap. I use a piece large enough to go about halfway back on my nail, fill in the corner and just-come-to or extend just a tiny bit past the free edge. The wraps I use are self-adhesive and I can't imagine not using them - they stay where you put them!  Don't worry if the edge isn't completely even. You will fix that later. 

Next you want to get your SOG basecoat. Apply it to the entire nail, including ALL of the silk wrap. Lay it on a bit thicker than you normally would. Not thickly, but not as thin as you normally would do it either for just a SOG mani. You want to really coat the silk wrap, especially where it's filling in the broken corner. 

Flash cure it for ten second in a UV lamp. If you use LED just do a couple seconds to set it. Then gently using your other hand shape it so that the c-curve matches your natural nails. Finish curing it fully for whatever time your lamp uses. 

Next comes the Hard gel!!  Grab a brush (I use a #6 oval gel brush myself) and get ready. 

Apply a nice coat of the hard gel to the nail.  I do a single coat and personally don't apply it super thin.  Not thin like I would a SOG polish.  It's not super thick either.  You could easily do multiple thin layers, but hard gel doesn't really need to be applied that way.  This particular builder gel is thick and doesn't really self-level.  I don't know if others do or not, but try to work it smoothly and evenly, let the brush float into the gel.  You may need to apply a bit of extra and smooth it around over the filled-in corner to make it all even.  

Look at the nail from all angles and make sure it looks relatively smooth and not all lumpy and uneven.  thickness should be even from front to back and side to side.  Cure for the time needed for your hard gel/lamp combo (for me this is 3 minutes in my UV lamp).  
Now it's time to remove the tacky layer and do you finish filing.  You want to file the free edge to the correct shape, then make sure the sides are even and match the natural line of your nail.  File/Buff the top of the gel to make sure it is even and has no lumps, dips or ridges.  If you have any deep dips, remove any filing dust, fill it in with more gel, cure, remove the sticky layer and file/buff again until it's all smooth and even.

You can see here it's a little bit thicker than my natural nail, but not so much that anyone besides me would notice it. 


Now you can finish your SOG manicure!  I didn't redo the SOG basecoat, it's not really necessary.  Just remove any dust with an alcohol wipe from your hard gel, and then do your color coats and topcoat.

This color by the way is Gelish Lady in Red from this years Year of the Snake two-color set.  The other color is a metallic gold.


These repairs always hold up REALLY well for me!  I never have any trouble with them lifting or coming off or bending with the hard gel on them.  I've used just Gelish Structure on very small broken corners before, and it works but it's much more flexible even with several coats of structure, so I much prefer to use the hard gel.  Hope this helps some of you ladies keep from having to file down just because you broke a corner!  Happy Polishing!

Here's a quick overview of the steps:

Sunday, February 26, 2012

SOGAA

What is SOGAA, you ask?

Soak-off Gel Addicts Anonymous, of course!  LOL.

For all you lovers of SOG polish, please come and join us on facebook.  In addition to stalking the Purse Forum's SOG threads, I started a group for us DIY Soak-off gel polish lovers.  :-)

I think we encourage the addiction more than we help it though, so be forewarned.  :)

If you would like to join us in our addiction, please click on the logo below.  Happy Polishing!  :)


Wednesday, February 22, 2012

TKB Trading pigment givaway

This is my first Giveaway EVER!  :-)

So, I moved all my pigments in baggies into jars today (well, at least until I ran out of jars, LOL).

The baggie I had of TKB Trading's Zirconium Cluster yeilded FOUR jars - this is way more pigment than I will ever use for doing my nails, and that is all I use these pigments for.  So, you guys get the benefit of all the extra!

This pigment is a white powder that is super-shimmery.  It has sort of a multi-colored shimmer to it.  I like mixing it into clear gel and then applying it over a dark color to add shimmer.  I'm sure you could also mix it into regular polish for all the frankeners out there.  :-)

All you have to do is leave a comment on this post.  Next Wednesday, February 29th, I will use a random picker to choose 3 people to receive one of these jars of pigment.  The winners will be posted, and then will have 3 days to send me their address via email (there is a link to contact me in the sidebar on the right).

Here is a picture of the three jars.  Each winner will receive one jar  (click on the images to enlarge them)

Here is what the zirconium cluster looks like when mixed into clear and applied over a black base.  

Here are a few other pictures.  The zirconium cluster is the one on the far left of the photos.  You can see it fits right in with the Sparks! Collection, even though it is not part of it.  It's about the same particle size though


Good luck everyone!  :)

A different (and maybe better?) way to patch a split nail

So, a day or two into my valentines day mani (wasn't even Valentines day yet! LOL), I got a split in my usual wayward thumbnail.  I abuse this poor nail (I know, nails are not tools, LOL) and unfortunately it splits more often than I would like.

So, after a long day of work where I tore it, I came home, ate dinner, put on my jammies and went to repair my split....... only to discover I could not for the life of me find my nail glue buried somewhere on the mess I call a kitchen table!  LOL.

So I decided to try something else.  I soaked off and carefully removed my SOG from that nail and prepped the nail as I normally do.

I cut my silk wrap to fit over my tear (a bad one too - nearly halfway across my nail) and stuck it over it.  I used Gelish basecoat over top of it instead of glue.  I scrubbed just a tiny amount over the silk wrap and cured it.  I made sure the silk wrap was completely covered with the gel, and that it was scrubbed into all the little silk fibers.

I had a small wrinkle in the silk wrap at one corner that I'd not been able to flatten out, so I removed the sticky layer with alcohol and buffed the wrinkle a little with a 240 grit buffer to smooth it out.

Then I applied Gelish basecoat over the entire nail, cured it, and continued on with my SOG manicure as usual. Because it was late after I'd worked all day, and I had to work again the next day I didn't bother applying structure.  I'd fully expected the nail to break completely after a day or two, which is what usually happens when I have splits this bad.

The finished repair and nail felt surprisingly sturdy!  I think I did this last Monday, so today would be 8 days on the repair.  It's still fine, the only reason I'll be changing up the manicure tomorrow is because I'm ready for a change and the growth is bugging me.  :-)

I'm very excited about this and I think everyone should give this repair a try.  I absolutely plan on repatching it this same way tomorrow when I redo my manicure.  It just seems like the gel layers bond together with the silk wrap so much better than with the nail glue.  I've been doing the repairs with the glue as I have shown before for a year, and was a firm believer in that system.  This type of repair might work better for everyone, but I think this will definitely be my new system!

This next time I will probably go ahead and apply the structure on that nail, as I'll be doing something with regular polish and I won't have the support from the gel layers.

This was the valentines day manicure.
Two coats of Gelish A New Sunrise Sparkle, then a single coat of Gossip Girl on the tips, then Artsy Fartsy Crafts "Valentine Multi-mix" glitter on the tips, and faded up the nail.

Update: 
While I don't have a video tutorial to add, I did take some pictures today when I redid my mani, and thus the repair.  (click on the pictures to see them larger)

After removing my old gel and prepping  my nails, I cut a piece of silk wrap to make a patch.  The ones I use are still the same as those I used in the previous method's video and are self-adhesive.  I applied the silk wrap piece as a patch over the split.

Next I applied Gelish Basecoat gel, making sure to really scrub it into the silk wrap, and cure.  This is what you should have.

It wasn't completely smooth, as I often have a corner of the wrap that folds over and I cant' get it to unfold.  No big deal - remove the sticky layer with alcohol and use a 240 or 320 grit buffer to smooth it out where it's bumpy and at the edges.

Apply Gelish basecoat over the entire nail as usual and cure

You can now go about finishing your manicure the same way you always do.  Because I was doing something with regular polish this time, I chose to just do a clear manicure, so I followed this with a layer of Gelish Structure and then Top It Off.  You cannot see the repair at all, even though a completely clear manicure.

Sunday, February 5, 2012

EZ Flow TruGel Review

I only have one TruGel color (Greystone) and I have to say I LOVE it!

For one, I love the color!  It's an awesome color and not like anything else in my large collection.  It's so nice to find a unique color!  As soon as I can upload some pictures (hopefully I'll be able to get my Google issues straightened out soon and be able to upload pics again - fingers crossed) I will come back and edit this post!

Application was easy.  I did use my Gelish base and topcoat, as I refuse to buy each different brands base/top.  I applied two coats of the Greystone.  They applied smoothly, gave me great coverage, and I experienced no shrinkback or streaking at all.

I wore this for 11 days, which is pretty average for me.  I had no reason to take it off really other than I wanted to do something new (I was super excited about a custom color I whipped up recently and just had to try it).  I could've definitely gotten at least two weeks out of this, if not more.

After about a week I had added some spectraflair on top, which was mixed into a little Gelish Simple Sheer, with a fresh layer of Top It Off (TIO).  So I had on base coat, two layers of Greystone, TIO, a layer of simple sheer with the Spectraflair, and new TIO.  Oh, and I didn't buff the original topcoat before I did the spectraflair.

Today I removed the mani (as I said, because I was dying to try out my other creation), and it removed LIKE A DREAM!  Even with two layers of topcoat.  After a mere 8 minutes most of it slid right off, with the exception of a few stubborn tip spots where I use bonder that I had to soak an extra minute or two.  Had I waited the full 10 mins I wouldn't have had to do that I'm certain.

I would definitely recommend the TruGel to anyone.  I loved it and can see adding more colors from their line-up.

While my google issue is not fixed, I have (as always) found another way.  :)   Sure hope Google gets my stuff fixed soon though - this process would likely be faster if you could CONTACT Google in any way, but apparently you can't.  ;-/


Greystone in the sun

Greystone with Spectraflair topcoat


Thursday, January 19, 2012

Allergies & Soak Off Gels


Allergies are no joke
Contact dermatitis and Soak-off Gels

There is much more information on the topic of allergies than I could ever give you in a small space.  And while I have a basic understanding of allergies (being an allergy sufferer of many things myself), I am not a scientist, so there is much more science behind allergies than I know.  

I highly recommend researching allergies on your own, as there is a lot of excellent information out there.  Just make sure you are getting  your information from reputable sources such as medical journals and other places that can back their information with accurate research data.  Speak to your doctor if you feel you are developing allergies if necessary.  And always avoid the allergen if possible.  


I apologize for the unusual spacing toward the end of my post and through the guest post. I have tried everything including retyping it all and it is still weird. :-(

What is an allergy?
The body’s abnormal immune reaction to a normally harmless substance that it feels is potentially harmful.

The immune system makes antibodies against a foreign substance (allergen).  When a person then comes into contact with this allergen, the antibodies react by releasing a number of chemicals (such as histamine) which cause allergy symptoms (redness, swelling, rash, itching, etc).  

Allergies can affect any part of the body. For example seasonal allergies or hay fever causing sneezing and itchy eyes, food allergies causing anything from GI upset to facial or throat swelling, medication allergies causing hives or a rash, or something you touch giving you contact dermatitis - which would be the case with allergies to SOG products.  

Allergies can range from localized minor irritation to severe and life threatening anaphylaxis.  


How do allergies develop?
Often through a process known as sensitization.  

The first time a person encounters an allergen, many times there is no reaction.  But this first time the body is exposed to the allergen, it creates antibodies against it.  The next time there is exposure, there may be a reaction.  This allergic reaction has the potential to get more severe each time there is exposure to the allergen, though this does not always happen.

In other cases a person may have an allergic reaction to something they’ve never encountered before, if the body considers the allergen especially harmful and attacks it immediately.  


Why do some people have allergies and others don’t?
That is uncertain.  It is suspected that there is a hereditary component.  If other family members have allergies it may be more likely that you will develop allergies also, but that is not a given. If you have an allergy to one thing, you are more likely to develop allergies to other things.


So, what does any of this have to do with using SOG?
As mentioned, an allergy can develop to anything.  

Once cured, Soak-off gel products have very little risk of causing an allergy, but the substances in uncured gel can be allergy producing.  This is why it is very important to keep uncured gel off your skin and to ensure you are using a quality curing lamp that is able to fully cure the gel.  

It is always recommended by manufacturers to use the lamp they either sell themselves or specifically recommend to be used with their product.  For those who like to use several different brands of SOG, it’s impossible to have every company’s different lamp.  However, most brands recommend either their own LED lamp (if they have an LED curable product) or a 36 watt CFL-UV lamp.  I believe that Shellac is the only company who specifically says you must use their CFL-UV lamp.  

That being said, the 36-watt CND Shellac lamp is a very good lamp.  Since it is a 36 watt lamp, it should cure any gel out there in the market.  If you refer back to my post on lamps, you will recall the possible reasons that one manufacturers LED lamp may not cure all LED-curable gels.  For one thing, the wavelength of light they emit is very narrow.  

If you aren’t using the correct lamp, it is possible that while the gel may look fully cured, it’s not.  Repeated exposure to the uncured gel means your body is constantly coming into contact with those potential allergens, which means you may develop an allergy to it.  

A couple of the members over on the Purse Forum have unfortunately already experienced just this type of allergy - a contact dermatitis when they applied their SOG..... A SOG they’d used for a while before with no issues.   Attached below there will be a guest-entry from one tPF member.  It is her personal experience and thoughts on the subject of allergies.  


So how does one avoid allergies to SOG?
There are no guarantees in life, so even if you do everything right, there is still the potential to develop allergies (to anything really, not just SOG).  However, you can do some things to hopefully prevent it.  Other people will never develop an allergy regardless, but why risk it?

Always keep uncured gel off your skin as much as possible.  Paint your nails carefully, keeping a thin margin around the edge of the nail.  If you do get any gel on your skin or cuticles, use an orangewood stick to remove it before you cure the gel.  Wash your hands as soon as you are completely done with your manicure to wash off any residue that might remain.

Again, use that correct lamp!  Are you starting to get the idea that this factor is really important?  :-p

You cannot tell just by looking at it if the gel is fully cured or not.  Often, undercured gel will have wear issues - chipping, peeling, not lasting two weeks when you used to be able to wear it that long (not everyone gets 2-3 weeks out of a SOG mani).  If all of a sudden you are having problems, your lamp may need new bulbs if you are using a CFL-UV lamp.  If you are using a new LED lamp, is it the correct lamp for the product, or are you using another manufacturers lamp?  

Not everyone may be privvy to undercured gel because they suddenly have wear issues.  Since there’s not really good way to tell if it’s fully cured or not, this is why many of us recommend using the proper lamp.  Even when you are having OK wear-time there is still a possibility the gel isn't fully cured if you aren't following the directions for cure times and lamp types.


What can I do if I do develop an allergy?
The best advice is to avoid whatever is causing the allergy!  When you’ve gotten used to having great nails because of SOG, the prospect of suddenly giving that up might be a little disconcerting, but it’s your health we are talking about here.  


It may be possible it's something else in the process of doing your manicure that you are allergic to. I posted on tPF here with regard to how to do a sort of elimination test if you really think it is possible that it is only one element causing the reaction.  If you find that all you are allergic to is one element, then you can try to replace that element with something else, another brand, etc.


Even if your reaction is mild, you shouldn’t continue to use the product if you are allergic to it.  Remember, allergies can get more severe over time for some people.  You don’t want to continue to expose yourself to the allergen in hopes the allergy will go away.  They usually don't.  


It seems that, at least in some cases, the SOG allergy isn’t related to the gel itself but rather to the photoinitiatiors that cause the polymerization reaction (cause the gel to harden).  It seems that LED-reactive photoinitiators at much higher risk of being allergy-causing than those that only cure in CFL-UV lamps.  


Shellac is one such product that is only CFL-UV-curable, and claims to be a bit hypoallergenic.  There are other CFL-UV only products out there as well, such as LeChat Perfect Match, Light Elegance P2 and many of the pot-style gels.  The only way you would know if these products would work for you too, like they did for my guest-blogger, is to try them if you are willing to.  


___________________________________________________________________________

Guest Entry From Krr607


Here is my sorry tale about how allergies ruined my fun with soak off gels....


All my life I have loved all things nail, on and off I went to salons but was rarely happy with the result and usually ended up coming home and perfecting the job myself. Over the years I spent a fortune on base coats and tops coats and different brands of polishes promising ’10 day’ , ‘ no chip’ formulas, but within only a few hours my nails would chip.


Then I discovered polish hybrids and soak off gel, firstly Shellac which I fell in love with, then Gelish which I became obsessed about (the gel content helped my weak bendy nails stay lovely for longer). I bought myself a 36 watt generic lamp and off I went, spent a small fortune on collecting as many colours and brands of SOGs as I could afford. Spent hours browsing the purse forum and Salongeek forums for tips and hints.


Then talk turned to the new LED lamps, which were curing Soak off Gel in seconds rather than minutes, this sounded so exciting for a DIY’er that I couldn’t resist, I bought that crescent shaped ‘better’ brand LED lamp from eBay and was delighted with the results.


Once or twice the cure wasn’t right, and the SOG wiped off on the gauze wipe, but I didn’t realise the implication of this and just put it down to something I had done (applying too thick, not curing long enough etc)


I felt that all the advice from manufacturers of Shellac and Soak off Gel to use the corresponding lamp for each system was merely a marketing ploy to make more money. In short, I wanted to save some money and thought I knew better.


All was well for several months and I was having so much fun, so much so that I wanted to start doing my friends nails , so I enrolled on a manicure course and my passion grew.


Then something happened that changed my mind completely....I developed an allergy...


I applied my Soak off Gel as usual and within a couple of hours my fingers around the eponychium became red, swollen and itchy. As I had been using SOG for so long I thought it must be something else so tried to ignore it.


I couldn’t ignore it, it was terribly uncomfortable and painful, so I soaked off my SOG, it was too late the damage was done. Over the next two weeks, the skin broke down and was incredibly painful, so much so that I even had to ask my husband to put my socks on one day as my fingertips were so sensitive.


Day one started with erythema and itchiness 


Later that day the skin break down started


Unfortunately, I did not take pictures of the severe reaction that followed but my fingers broke down with pus filled blisters which eventually burst and became open weeping wounds.


This was approximately day 10 when healing was almost complete! 


After this happened I began to read extensively and came across Doug Schoon’s articles.


I am no scientist and can't remember the exact terminology, but my basic understanding was there is a difference in wavelengths between lamp bulbs and it’s not all about wattage which merely refers to the electricity output (Doug please correct me if I am wrong). The bottom line is I learnt the hard way , I thought I knew better..You CANNOT see with the naked eye if soak off gel is overcured or undercured, it is undercuring that causes over exposure to the gel and over time can lead to sensitivity and allergy issues.


Now fortunately I have found a happy medium, I can use Shellac, it is hypoallergenic and can only be cured in the CND UV lamp. I use the complete system and tread carefully with my application so as not to touch my skin with the product.


I urge anyone to follow the manufacturers instructions, don’t cut corners like I did and don’t think it won’t happen to you ( or heaven forbid a client) , allergies are more common than you would think and once you have developed this problem there is unfortunately no going back.


I would recommend everyone read Doug Schoons work as he is one of the world expert’s in the science behind nail products and has dedicated his career to this.


___________________________________________________________________________

Some other resources and information regarding allergies and nail enhancements:

Wednesday, January 4, 2012

Favorite SOG mani's to date

I thought since I just created one of my favorite SOG mani's so far, that maybe I would do a post on a few of my favorites.  These aren't necessarily in order of my faves, but rather I am working in reverse chronological order, LOL.  I guess since that is how my charting always is, that's the only way my brain really works anymore.

This is a very pic-heavy post.  But I assume none of you mind a little "polish porn".  :-)


Aragon Holo
This is the latest favorite, and my current manicure that I just did.  This is OPI Gelcolor's Here Today, Aragon Tomorrow (given to me by a friend) mixed with coarse grade spectraflair.  I'm in love.  I had a great Christmas mani (below) but I wish I had thought of this combination earlier!  :-p

This color wasn't really one of my favorites straight out of the bottle.  It's such a dark color it really looks almost black.  I really didn't need another nearly black polish.  When I mixed a few drops though with a rice-grain sized amount of spectraflair - WOAH!  Amazing forest green linear holo!  The pictures really don't capture the linear-ness of it well unfortunately.  My big camera's batteries are recharging.  Maybe I can add some better pictures tomorrow in the sun.

I am using an old contact lens case to mix in, as was suggested by a member over at The Purse Forum.  It works really well in fact, and then I can store what I have left over from the mix (in case I need to do any repairs), and it's protected from the light as my case I'm using is opaque heavy plastic.


Blingy Red Funky French
My previous manicure was the one I did for this Christmas - my beautiful holiday mani!  No mixing involved here.  I used two coats of Gelish Waterfield as the base color, then did two coats of Red Carpet Manicure Glitz & Glamorous on the tips (a dupe for Gelish Queen of Hearts).  I use a small old eyeshadow brush dipped in alcohol to clean up my smile lines.  Very easy.  

A couple days before Christmas I added the little reindeer decal to my ring finger (sorry for the crappy cell phone pic on that one).  

It was a great mani that I kept on the full two weeks (i'm usually bored with it and change it up after about 10 days).  Even then I was reluctant to take it off and change it, but i was anxious to try out a newish color in my untried stash, and the new lamp I got for Christmas!  :)  


Color Morphing Mania
A few mani's ago I did a color-shifting mani.  I used a chameleon pigment from Sik Custom Paint that shifted teal, blue and purple. It was incredibly hard to capture the color-change, but it was another I left on until I broke too many nails after just coming back from vacation that there was no real fixing it.  

Here I mixed the pigment powder with Gelish Structure gel and applied it over a base of Gelez Pitch Black (a black creme).  Color morphing pigments show their many true colors best when over a black base.  Lots of pics of this one, since it was so hard to really capture the color shift and get all the colors.  


Flame Swirl Funky French
Another great one that I got a lot of compliments on - my flame-swirl mani.  I used Gelish Ambiance here as the base.  Then I put small dots of Orly Gel FX Rage and Artistic Colour Gloss Eccentric on the tips, and used a dotting tool to swirl the two colors upward together.  Very easy to do, even if you think you can't keep your hand steady enough to do a traditional french and keep the smile line clean.  


The Orgasm Mani
........Meaning the mani I used my NARS Orgasm blush as a pigment for this.  What were you thinking?  Get your minds out of the gutter!  :-p

For this mani I scraped a little of the blush onto a blob of Gelish Structure and mixed it in.  I applied 2 coats as the base and then did the tips in Gelez Pitch Black.  Again, I cleaned up my smile lines with the eyeshadow brush and alcohol.  


Up in the Blue Holo
Another great favorite: Gelish Up in the Blue mixed with Spectraflair.  This was before I got the coarse grade, so this one is made with the mid-grade.  It's still very holo, just not quite as sparkly as the coarse grade.  It's still plenty sparkly though!  

After about a week or so I was dying to try to see if you could water marble with SOG.  Well, you can.  Messy, yeah a little.  Actually not as bad in my opinion though as doing it with regular polish, as you can just use a towel to wipe off any excess and peel off your tape before you cure.  Clean up from the cup..... not so easy.  Thankfully I used a plastic cup.  Defnitely don't use anything you'd want to keep.  :-p

The water marble was done with Artistic Colour Gloss Wham, Fly and Deblu.  I did it over of course a completed SOG mani, since the mani was about a week old.  I would recommend that - If you don't like the way it came out, then it's easy to wipe it off and try again!  :-)


Breast Cancer Awareness
I loved my breast cancer manis.  I've done two of them.  First of all, I love french manicures, and I wholeheartedly support breast cancer research and anyone who has been affected by breast cancer themselves or in a family member, friend, etc.  

Both times I have done it on myself it's been as a french manicure.  I use Gelish Ambiance for my base and Gelish Sheek White for my tips.  I used Gelish Passion to paint on the Pink ribbons.  

For the other mani below, which I did on my mom back in October for breast cancer month, I used Gelish Less Talk and the Pink Ribbons were water decals.  


The Ruby Slipper Mani
One of my all time favorite combos is what I call the Ruby Slipper mani.  It's a dark color (like a dark purple like Entity One's Midnight Runway (a dupe for the Original Gelish Bella's Vampire), black or a dark blue) with Gelish Good Gossip layered over it.  Good Gossip is a very versatile color.  It looks amazing on it's own, but since I am weird about reds on my own hands and like dark colors, this combo is perfect for me.  :-)

And when I say the "original Bella's Vampire", let me explain..... It seems to me that gelish has changed the color somewhat.  Bella's Vampire was one of the first colors I ordered when I started SOG a year ago.  It was very much purple, not a dark red as the name (to me) would imply.  However, I recently picked up a new one in a mini version from Sally's and it is decidedly a dark red.  Not even close to the very dark purple that was my original one.  No biggie to me, as the Entity One color was a dupe for it.  And the newer version I have is what I always expected the color to be!  Win win for me!

Here you can see that the Entity one (on left) and the Orignal Bella's Vampire (on right) I had were dupes, and both very, very purple!  I'm trying to get a good shot of the new bottle I have's color, and will update this post when I get one.


At any rate, this is 2 coats of Entity One Midnight Runway with a coat of Gelish Good Gossip over it.  Forgive the odd-looking middle fingernail.  This was in my early stages of SOG, and the very first time I ever tried to sculpt a tip on a broken-way-too-short-to-make-me-happy middle fingernail!  Not a bad try for a first attempt, but I have much improved over the past year when I have to do this!  :-)  I had used a clear gel here, so it makes the color look a bit sheer and patchy on the tip of that middle finger.

I get TONS of compliments on this combination whenever I wear it!  Try it!  You will too!


Bella's Holo
One of my very first favorites was another combination creation of mine.  I desperately wanted a medium-purple holo.  So I made one.  This was 6 drops of Gelish Sheek White mixed with 4 drops of my original bottle of Bella's Vampire (further proving it was truly purple) and then I added Supernail Silver Rush holographic glitter powder I got from Sally's.  This was long before I discovered spectraflair.  The Silver Rush doesn't make a linear holo, but it was a very pretty mani.  Sorry, the first pic is a cell phone pic, but was more representative of the color.  The other two the flash made the purple appear much brighter than it was in reality.


Well, that's it.  I hope you enjoyed this latest picture heavy post.  :)  See you all soon!